Wednesday, January 27, 2010

Heart Garland

Just popping in with another cute and easy idea I just found on a fun craft blog with tons of great ideas. Made by Rae shares this adorable heart garland tutorial.

So fun! I just may have to put everything on hold tonight so I can whip up a strand for our mantle too.

Tuesday, January 26, 2010

Ideas & Inspiration

Several of you have e-mailed me with questions and I thought I'd just post them (the ideas) on the blog to share with everybody. (Valerie, I promise I'm going to do the onesie dress tutorial you asked about, I just can't get to it tonight...but is IS coming, I promise!) :)

Ok, first topic up for discussion is appliques. Emily left a comment asking me where to find cute ideas for appliques. They are easy to do, but sometimes hard to come up with a cute idea on your own.

Before I share the places I usually use for inspiration, please remember NEVER to copy anybody's idea for profit. I personally don't think it is wrong to try to duplicate something you see online for your own child, but I do think it is wrong to see somebody's idea and try to reproduce it to sell.

Things I Use for Inspiration:
-Etsy (search children applique)
-Tiny Prints (or any stationary website)
- Pottery Barn Kids catalog
-Flickr
-Gift bags
-Coloring books
-Recreating something you see in a store (like Target)
and yes, I have been known to whip out my camera phone to take a picture of something I see while we are out shopping to help me remember!


Here are a few examples of what I'm talking about:

This image from Tiny Prints...
lion

translated to this applique:
DSC_0108

This image that I found on Etsy...
cupcake-card

translated to this cupcake onesie:
DSC_0041


I can't find the picture I used as inspiration for this shirt, but it was from artwork in a little boy's nursery...
DSC_0075

And these last two were from some bedding from Pottery Barn Kids...
DSC_0017

DSC_0086

You just have to keep your eyes peeled and look in some unexpected places for some cute ideas. And the simpler the image, the easier the applique is going to be to make.

*************

Ok, now moving on to Anne's question about bulletin board ideas. Before she asked me this question, I had already been collecting images for ideas to use in our office/sewing room that I'm working on decorating. That being said, I only saved images and not the sources because I didn't realize I'd be posting them to share. If you know where a photo comes from, please let me know so I can give them credit!


tumblr_kwm3wwaqQK1qaplguo1_400
Martha Stewart (?)
This is a cookie sheet that was covered in pretty paper, but if you wanted to create it on a larger scale, you could use the same idea, but with a piece of metal sheeting from your local hardware store - instant magnetic board!

gt02septmsl_messageboard_l
Martha Stewart (again...I think?)

28007_0_8-5623--
Cute idea to attach shutters to the outside to close the bulletin board up to hide the messiness when not in use. I know they sell used shutters like this at the Re-Store for a couple of dollars a pair.

28012_0_8-1251--
I like the idea of adding envelopes at the bottom of the board and dividing it up into different sections. Would help keep your thoughts and ideas easily organized!

28014_0_8-7201--
This is a cute idea to cover a embroidery hoop with some fun fabric. You can pick them up at any craft store, but I don't think I would find such a small board very helpful.

tumblr_kwdgg52k7T1qaplguo1_500
Cute DIY project found here. Just cover an board you already have in burlap and decorate with tacks.

final2
Or, you could repurpose a board you already have with this tutorial from Little Green Notebook. Simple and easy!

********

And one more thought on organizing ideas and inspirational photos...
open up a tumblr account!

Any time I find an idea, recipe, or project I want to remember, I post it to my tumblr blog. I can flip through my pictures at any time and they are linked to the blog/site where I found them. You can also write little notes to yourself about each posting. I find it very helpful in keeping track of ideas I find online.
:)

Fun Valentine DIY Project

Last week I was looking for a fun, easy, and free way to entertain the girls for the day. I stumbled upon this blog post on making salt dough and thought they would make cute ornaments to use for a Valentine's tree. They looked easy enough and we had all of the supplies on hand.


valentine

Ours didn't turn out as cute as the ones above, but the girls had fun playing with the dough and I got the crafty fix I had been needing. ;)

Recipe:
1 cup all purpose flour
1/2 cup salt
mix well and add
1/2 cup warm water
Form dough and shape with your hands or use cookie cutters
Bake at 325 degrees for a couple of hours

saltdought

We rolled out the dough and used cookie cutters to make our hearts. I then made small loops with some wire to insert in the tops of each heart.

We made the ornaments in the morning and they baked in the oven while the girls napped. That afternoon we painted them pink and red and added some pink glitter for a little sparkle.


DSC_0038

A few of the smaller ones we used to make heart necklaces...
DSC_0026

...but the rest we used to decorate our tree.
DSC_0010

To make the tree, we found a large branch in the yard that had lots of smaller stems to hang the ornaments on. We covered one of Caroline's formula cans with red scrap booking paper and used some floral foam to anchor the branch in the can, covering the foam with some small pebbles.

The recipe actually made about twice this many hearts, but our golden retriever must have thought they were cookies instead of ornaments. I wasn't thinking and left the sheet of ornaments outside to cool and he gobbled up about four before I realized it!
Oops! :)

Monday, January 25, 2010

Cheap Thrills

P1010039

Several weeks ago, I discovered a wonderful & magical place. A place where my children are entertained with rides, popcorn, and stickers. A place that is quiet and empty, where my talkative toddler can converse to her hearts content and my baby who squeals (constantly) without warning won't disturb other shoppers.

It is called the Home Depot and it has become my new best friend.

I don't know why, but I've always been a Lowes girl. However, this bathroom project has caused me to venture out of my comfort zone and visit the OTHER hardware store in town and I'm a total convert. For any other moms out there who are at their wits end pent up indoors with cold winter weather, get yourself to your local Home Depot.

The employees are so helpful and friendly and the store is fairly empty during the weekdays. I have never been brave enough to steer one of those car buggies in the grocery store, but I let Anna Cate try one a few weeks ago when we ran in to look at tile. She thinks it is an amusement ride and is giddy with excitement to ride around the aisles. And unlike Target, getting out of the house to walk around Home Depot won't hurt your pocketbook, unless of course you are remodeling a bathroom and then you best watch out. ;)


And speaking of the bathroom, we are STILL not finished. Will and Dad installed the tub, tiled the shower, tiled the floor, and have put up the bead board and other molding.

The project has now been passed over to me and I can honestly say, I'm overwhelmed. I think I've purchased (and returned) about 5 light fixtures, 3 sink faucets, and have yet to start looking for mirrors. I did start painting the bead board this afternoon while the girls napped.

DSC_0019


This picture is the first night the girls got to take a bath in their new tub. Anna Cate loves how deep it is. She thinks it is a swimming pool!
DSC_0032
Caroline: "Thanks Dad, this is great!"

Another reason the bathroom is moving so slowing is because I have several other projects I'm also working on at the same time (on top of trying to keep the house straight, keep 4 tummies full, everybody in clean clothes, and 2 little ones happily entertained). And I'm excited to announce that for one of these projects, I got to purchase my very first power tool!!

Ok, it is really just a staple/nail gun. I am a weenie and couldn't use my dad's because it is too hard to push, so I bought my own electric one.

DSC_0010

You may be able to tell from the picture what I'm working on, but I don't want to reveal anymore until the project is done, which will hopefully be by the end of this week...

I've also been working on pulling ideas together for several of the requests/questions some of you have sent, so if you are still waiting on those...I promise to post them by tomorrow! Thanks for being so patient. I know it is going on 2 weeks now! :)

Tuesday, January 19, 2010

Still Here

We are still here and everybody is well. Sorry it has been awhile...
Just been busy finishing up this bathroom, getting our house back in order from the holidays, and enjoying this beautiful warm weather!

caroline2


annacate

I hope to be back soon with updated bathroom pics and some fun crafty stuff to share for those of you who have e-mailed with some request. Onesie dress tutorial, applique ideas, and a fun valentines craft for the kiddos...

Friday, January 8, 2010

Happy Friday to You

DSC_0357
If a picture is worth a thousand words, then this one pretty much sums up the week we've had around our house.
So glad the weekend is finally here!!

I found this rather funny quote last night on a card from a friend as I cleaned out some old boxes I still have from college:

No one ever has it "all together." That's like trying to eat "once and for all." Marilyn Grey

That may be true, but as I struggle (in vain) to get it all together, Caroline is trying her best to eat once and for all. My how this child can put away the baby food, cheerios, and Ritz crackers!

Thanks to everybody who has e-mailed about the sewing workshop. The class on February 20th is full and I had so many people interested that we now have a full class for March as well! Needless to say, I had no idea how popular this was going to be and wasn't near organized enough when I first announced it last weekend. I'm hoping to get some more dates on the calendar for some more beginner classes, and will hopefully have those dates to share at the first of next week.

Hope everybody has a fabulous weekend!

Wednesday, January 6, 2010

New Date for Sewing Workshop!

38
I was overwhelmed and excited with how many people are interested in the sewing workshop we are doing on February 6th! Because so many of you are wanting to come, I'll be having another one on February 20th. This one will be exactly the same as the first one so please scroll down to see that post if you missed the details.

If you have expressed interest to me in coming, you should have received an e-mail back from me letting you know which date you are signed up for. If you want to come and don't see your name listed below, please let me know ASAP!

February 6th:

-Dawn Burns
-Leslie Delaney
-Hannah Epting
- Baylis Griffith
- Meredith Jenkins
- Lil Mason
- Courtney Molony
- Nikki Mooneyhan
- Amber Stanis

*******

February 20th:

- Jaclynn Goings
- Stephanie Jones
- Kelsey Mathias
- Sha Robertson
- Sabrina Smith & friend

There are still 3 remaining spots for the workshop on the 20th and I'll be glad to have another one if there are more of you who want to come.

Please send me an e-mail to ourhappylittlenest@gmail.com.

I look forward to seeing all of you ladies in a few weeks!

Getting There...

Slowly, but surely, the bathroom is starting to look like a real room again. For the record, let me just say I do not know how people totally renovate houses themselves. I used to dream of buying an old farmhouse and totally fixing it up. No more. This little project is about to do me in and I'm not even doing any of the work!

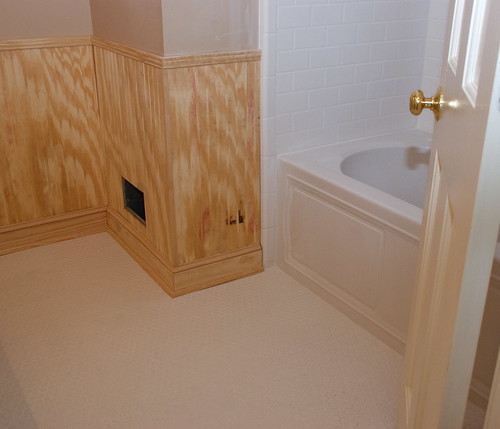
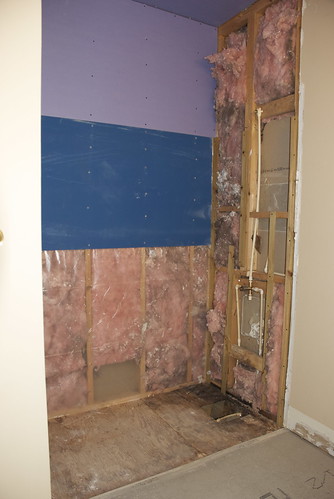
Since I've posted last, the guys were able to put down new sub flooring, lay the DUROCK flooring, knock down the old wall over the shower and re sheetrock that wall.

DSC_0004

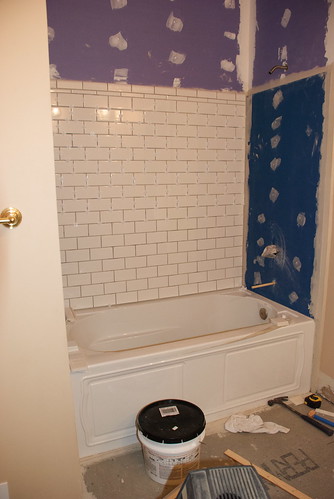
Then they got to start working on what I think is the fun stuff! The tub went in and they started tiling the shower walls. We are putting white subway tile around the shower. The tile hasn't been grouted yet, but this gives you a basic idea...
DSC_0011

Our vanity area currently looks like this while we are waiting for our countertops to be installed:
DSC_0005

Which brings me to this little public service announcement:

Always give yourself plenty of time to plan all of the details of a project BEFORE you dive into the work.

I have been collecting pictures for months for ideas for the bathroom because I knew at some point we were going to have to renovate it. However, Will announced (the week before Christmas) that he was taking several days off to do the bathroom and I needed to pick out what I wanted to have it ready for him. In my excited rush to get everything done, I failed to consult all of my old files and totally forgot I had this idea for the vanity.

bathroom

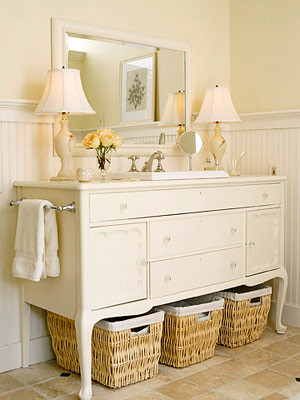
I love the idea of refurbishing an old dresser to use for the sink vanity. If I had had a clearer head, I would have started searching Craigslist for a piece like this:
use for bathroom vanity

And would have paired it with two over mount sinks that I always find when I visit the ReStore in town. A dresser like this usually goes for around $50 - $100 on Craigslist and the sinks are usually around $10 - $20 a piece at the Restore. At the most, our total would have been around $140. Instead, we went with the cultured marble countertops for $400.

Bummer.
At least I know we'll be redoing the master bath sometime in the near future. Maybe I can incorporate this idea into that bath's design.

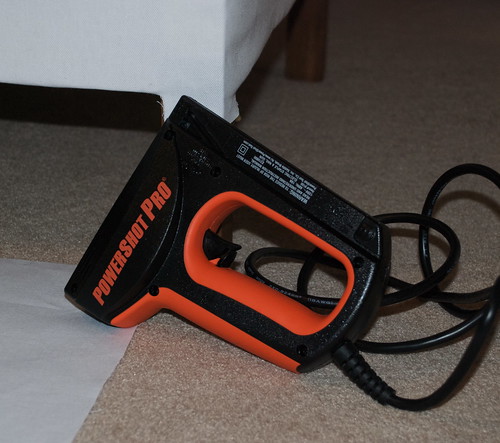
Anna Cate loves helping her daddy and Boula (aka my dad) in the bathroom. They have patiently allowed her to "work" alongside them. I passed by the door the other day during a lunch break and saw her tiny hammer and little pink tape measure laying beside their big boy tools. Sweet girl.
DSC_0001

And speaking of sweet girls...
DSC_0004

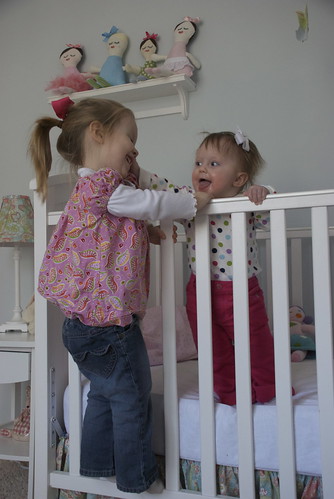
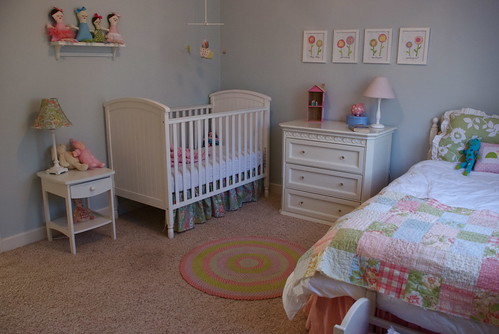
These two monkeys have become roomies.

My plan has always been to let them share a room when Caroline moved into a big girl bed. My sister and I shared a room until I was 5, but even once we were in our own rooms, she would end up right back in the bed with me most weekend mornings. We've been up a lot lately with Anna Cate in the middle of the night because she is scared of the dark and wants to come sleep on our floor. That is not a habit I'd love for her to start, so I tried putting the girls together in one room so AC didn't feel alone and it has surprisingly been working out great!

DSC_0002
I tried to pull together their stuff with similar colors so the room didn't look too mismatched. It is definitely a hodge podge look, and a little bit on the pastel side, but it is certainly cozy and inviting and the two of them are loving it.

And speaking of moving things around, my old sewing room became the new playroom several months ago and I haven't taken the time to set up my sewing stuff in a new place yet. It has all been sitting in a massive pile of messiness since August.

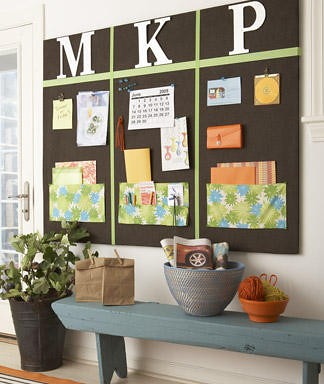
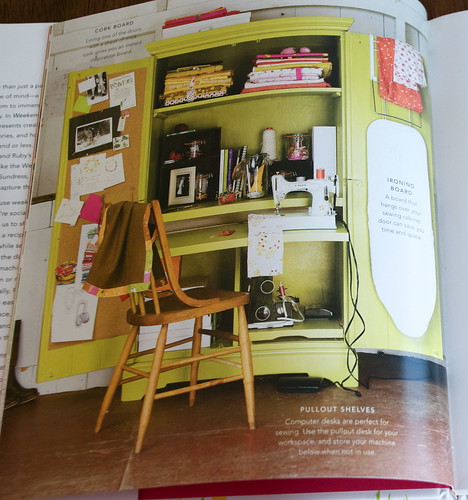
One of my Christmas presents this year was a sewing book and I fell in love with this idea of using an armoire to create your own little sewing "room".

DSC_0025

Before I saw it, I had already promised Will no new projects until March. I have a corner hutch in the kitchen that I found on Craigslist that needs to be painted and a chair from Goodwill that needs to be upholstered. I keep meaning to get to them, but other things pop up.
Ahem.
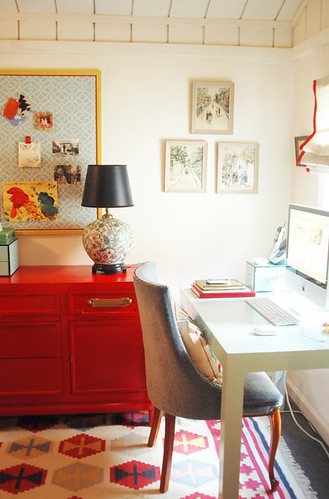
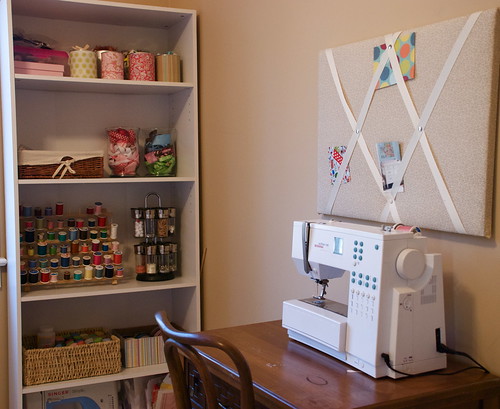
SO, instead of finding a used computer armoire to convert to a sewing room, I just made do with a bookcase in the corner of one of our spare bedrooms.

DSC_0009
With limited space on the bookcase, it forced me to clean out my sewing supplies and now everything is neat, orderly, and I know what I have and where it is.

This it totally unrelated, but before I go, let me leave you with these pictures.
DSC_0037

We now have enough hair for PIGTAILS!!! What is it about pigtails that makes those chubby cheeks even more irresistible ? And does she not look JUST like a little Will, except for the hair?

These are for you Steph, because I know how much you love the "lady of a thousand looks." Enjoy!
DSC_0059

DSC_0062

Friday, January 1, 2010

Mark Your Calendars!


26_IMG_2224


I'm really excited to announce plans for a sewing workshop the first weekend in February. Many of you have been asking for some help in learning to sew and although I'd love to work with each of you individually, I just don't have that kind of free time right now. Instead, we can all get together for a little bit of girl time and sewing instruction!


When:
The workshop is scheduled for Saturday, February 6th from 9 am until 2 pm.

What:
This is a beginner's level workshop, meaning if you are already sewing dresses, bags, pillows, etc. you probably won't benefit from the workshop. However, if you have never sewed a stitch before or if you have dabbled in it a bit, but would like to have a better overall foundation of sewing to follow patterns and tutorials, this would be a perfect fit for you!

We will begin with a general overview of sewing with a machine, including the different types of sewing techniques, stitch applications, best places to buy fabric and patterns, etc.

Then we will move onto three different sewing projects which incorporate all of the sewing techniques you will need to begin sewing on your own!


Workshop Sewing Projects:

DSC_0025

DSC_0220

DSC_0023

Where:
Lexington, SC
My grandparents have very generously offered their lake house for us to use. If you register for the workshop, you'll be receiving more information on this.


What to Bring:
Your sewing machine
3/4 yard of fabric (for pillowcase dress)
2 yards of coordinating ribbon (for pillowcase dress)
bagged lunch

Other Info:
-Their will be a $35 fee due on the day of the workshop.

- All of the materials for the projects will be included, except for the pillowcase dress. (I thought you may want to pick that out for yourself.) ;)

- You'll leave the class with a ruffled scarf, baby bib, and a pillowcase dress. You'll also take home 2 patterns (the bib and the pillowcase dress) and a little booklet with all of the info we've covered in the class for future reference when you are sewing on your own. Also included will be a Rosie Posie Doll Kit as a take home sewing project!

- Registration is first come, first serve. If you are interested in coming, please send me an e-mail to ourhappylittlenest@gmail.com or to my personal e-mail address if you have that. We have 8 openings for the class, but if we have more ladies wanting to come, I'll be happy to have another workshop at a later date.

-If you DON'T have a sewing machine, but are interested in participating in the workshop to see if you would enjoy sewing before you purchase your own machine, I have ONE spot available. I got a new sewing machine for Christmas and have my Singer Simple available for someone who doesn't have a machine.

- Once you have sent me an e-mail and I've confirmed your registration, you will receive a packet in the mail with all of the other information you'll need for that day.


I'm really excited about this and hope it will be a fun day for everyone involved! I'm really looking forward to hanging out with all of you and maybe even making some new friends. :) If you have any questions, please don't hesitate to leave a comment or send me an e-mail!

P.S. - Anybody is welcome to come! Please spread the word to your friends or family if you know of anybody who would be interested.

***********
UPDATE: You guys are awesome! I had no idea there would be such a great response to this workshop! There are only 2 spots still available for February 6th and the spot for the sewing machine has already been taken. However, I'm already planning on offering another class because not everybody who is interested can't come on the 6th so please let me know if you want more info for the next one!

*********
There are no longer any open spots for the class on February 6th, but I'm already taking names for the next class which will most likely be sometime later in February. If you are interested in getting on the list, please send me an e-mail and I'll send you the info for that class once a date is set. Thanks! :)