Saturday, June 25, 2011

Party Details

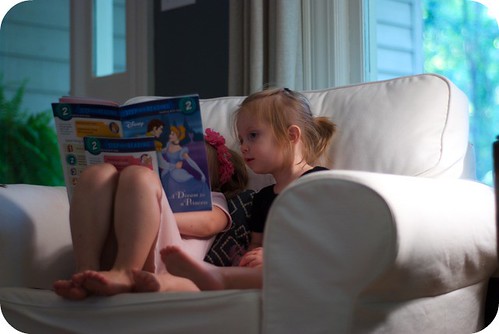
It has only taken me a month, but here is the breakdown of the little projects we worked on for the girls' party. Most of them are pretty self-explanitory, but feel free to ask specifics if you have any questions! :)

Picnik collage

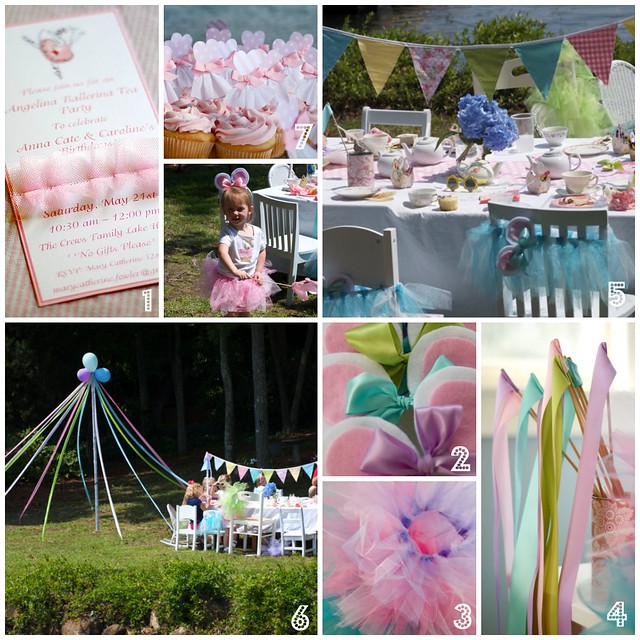
1. Invites - the invitations were designed in Microsoft Word (about the only computer program I know how to use!) and printed on card stock. The Angelina ballerina at the top of the invite was an image found online and I sewed little scraps of tulle to the cardstock to look like a tutu. Matching pink envelopes found at Hobby Lobby.

2. Mouse ears - I covered two packs of headbands from the dollar store with thin, white ribbon and then made the ears from pink and white felt. Used leftover ribbon from ribbon wands (see #4) to make bows to hotglue between the ears.
Four yards of tulle was enough to make three tutus. Tulle goes on sale for 77 cents a yard at Hobby Lobby about every month or so.

4. Ribbon wands - All you need are some wooden sticks from the craft store and several rolls of satin ribbon from Wal-mart. Wrap one end of the ribbon around the stick and secure with a dot of hot glue.

5. Penant banner & tea set - For the banner, we cut the flags from scrap fabric and sewed them into the fold of bias tape. super fast and easy! I made two banners; one for the food table and one for the tea party table. To hang them over the tables, we used a 1.5" pvc pipe from Lowes ($1.28) and wrapped it with crepe paper. They are really long (8' I think?) so we only had to buy two and Will cut them down into four poles.

The mix-matched tea cups and plates were found at thrift stores. I had the most luck at LICS and the Restore, both in selection and price. Most cups and plates were around 25 - 50 cents a piece. The white mini tea pots were found on clearance at TJ Maxx.

6. Maypole - We used 4 rolls of crepe paper, 5 balloons, and an 8' steel pipe (my dad had) to make the maypole. Will dug a hole in the ground while I was wrapping the pole with crepe paper. Then we taped 12 long strands of crepe paper to the top of the pole and decorated the top with balloons. After Will buried about 2' of the pole, we taped the loose ends of the streamers to little wooden sticks and stuck them in the ground. It made a really pretty tent-like structure. Total cost was less than $5 because we already had the pole on hand.

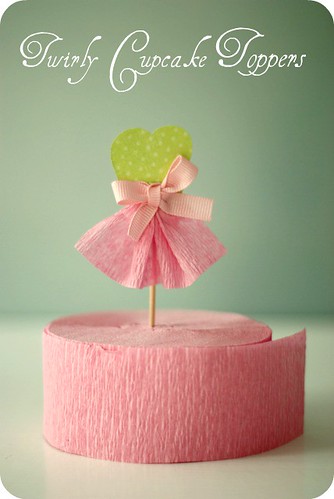
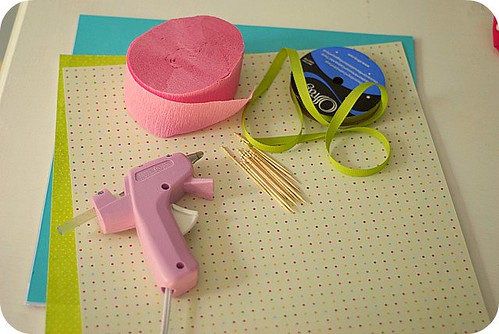
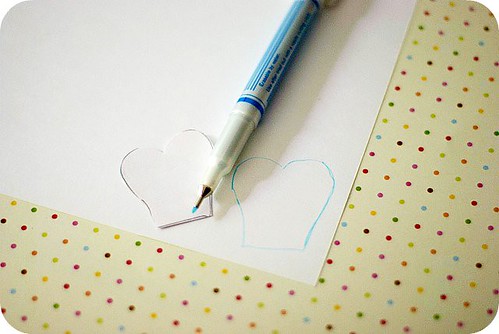
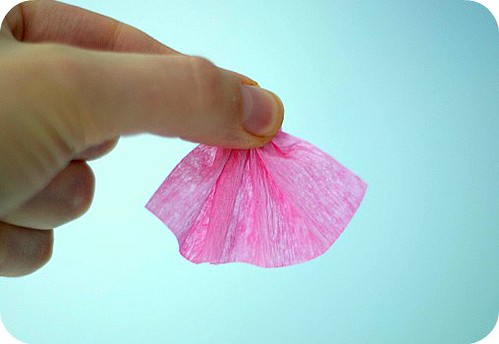
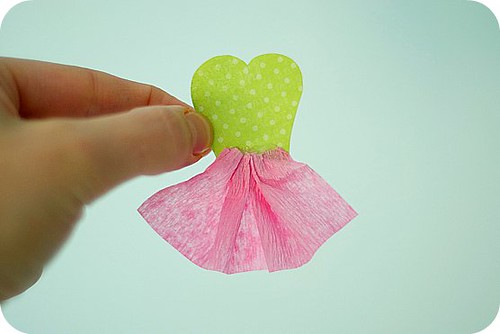
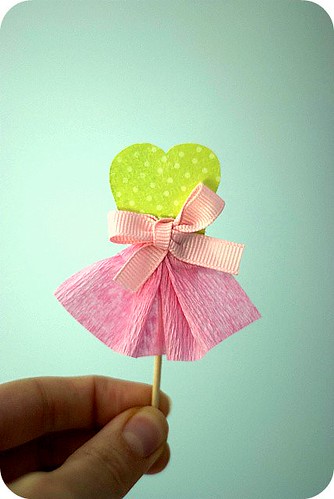
7. Cupcake toppers - the little ballerinas toppers on the cupcakes were made with left over supplies from the party. All you need is a piece of scrapbooking paper, some crepe paper, toothpicks, and some ribbon.

And there you have it! A fairly easy and economical birthday party that was a lot of fun to pull together! :)

Wednesday, June 22, 2011

Summer So Far

It feels like summer just started, but June is almost already over! I have really been looking forward to summer this year. For the past four summers we have either had a newborn (or two!) in the house or have been moving or have been planning a wedding. It seems like the months of June - August would fly by before we even had a chance to enjoy summertime. This year, our only plans are to enjoy spending time with our friends and family just chilling out and having fun!

So far, we've had a...

beach trippin'
summer9

ice cream eating
summer6

book reading
summer4


pool swimming
summer8

library visiting
summer5

fort making
summer10

daddy celebrating
summer3

...kind of summer!

And here's hoping that with our relaxed schedule, I can find some extra time to squeeze in a little more blogging. I've missed being on here lately!

Saturday, June 11, 2011

In a Year

What a difference a year makes! She has gone from baby to big girl in the blink of an eye.

beach

beach3
From June 2010
...
...
...
...

To June 2011
beach3

beach1

beach4

beach5
And she is having a ball at the beach as a big girl this year!!
:)

Friday, June 10, 2011

Better Late Than Never

Ooops! I have been gone much longer than I had anticipated. Life has been busy busy busy with summer finally here! We are on vacation this week and for the first time I didn't bring a project to work on while we are here. Updating the blog will be my project in the evenings while the fam sits around watching movies (I don't sit well without something to keep my fingers busy).

So without further delay, the cupcake tutorial from the ones we made for the girls' party.

cupcake topper
These are pretty simple and you could probably figure out how to make them yourself without a tutorial, but what fun would that be?
;)

These cuties can be made for pennies. In fact, you probably have all of the supplies you need in your house already. They are super easy to make and would be so fun to use for a bridal luncheon or shower!

Let's get started...


Here's what you'll need:

cup2

:: scrapbooking paper

:: toothpicks

:: crepe paper

:: ribbon

:: hot glue gun

Step One: Trace and cut out dress top from scrap booking paper. Start by drawing a heart, but square off the bottom instead of bringing it to a point.
c3


Step 2: Cut a strip of crepe paper about 4 inches long. Gather and pinch together at the top until it looks like a skirt.
c5


Step Three: Glue the skirt to the bottom of the dress top. Careful because the glue is HOT and the paper is thin!
c6

Step Four: Embellish with a bow or flower and glue the toothpick to the back.
c7

Wala!
A perfectly adorable twirly skirt cupcake topper! :)